

It’s the end of yet another school year, and time to get more name labels for the upcoming year. We’re extremely blessed to receive a Tools for School Kit from Stuck on You labels in preparation for my little girl’s first year at Primary school next year.

What sets this kit apart from others is that her name is printed on everything. Everything with the exception of the eraser, but it’s still so cool!

I love how every single marker and colour pencil has her name!

We won’t normally paste name labels on every single colour pencil our kids bring to school and we know how kids gather together to do their colouring activities and go away with one or two colour pencils missing or from some other set because inevitably things got mixed up? Yeah, I’m so stoked that at least if it gets mixed up somewhere, someone would know it’s hers eventually! We also love how everything she needs fits neatly into the quality canvas pencil case!

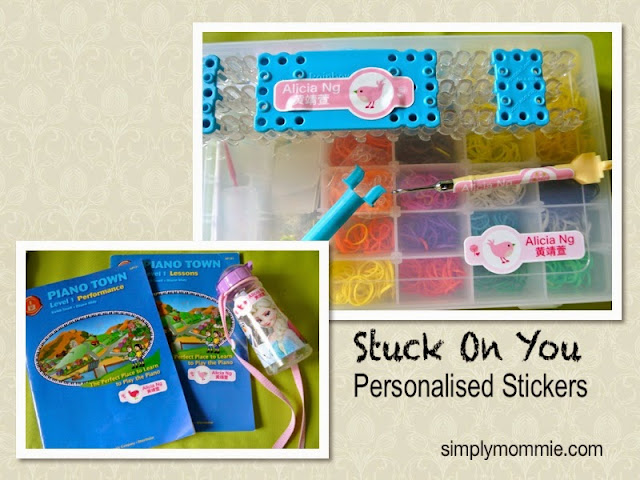
Apart from the Tools for School kit, we also received a set of name stickers for each of the kids. There’s a wide variety to choose from from the Stuck on You labels section and we honestly had a tough time deciding. There are name labels, name dots, shaped labels amongst many other types, labels for clothes and shoes and different sizes for all the types of stickers.
We eventually chose the Penny Scallan labels. The labels are of extremely good quality and are dishwasher and microwave safe. The Name Labels also have a scratch resistant, protective coating which means they maintain their vitality and will not smudge or fade with bumps and scrapes. The kids have been using their water bottles with their stickers stuck on for more than a month now and they are still looking great! They stick and stay stuck!

As you can tell, you can print Chinese characters on Stuck on You labels! Now that is something that I’ve been waiting for a quality label company to come up with and the wait is finally over!
Besides their water bottles, my girl stuck hers on her Rainbow Loom set and hook because she brings out her set to loom with our homeschool friends.
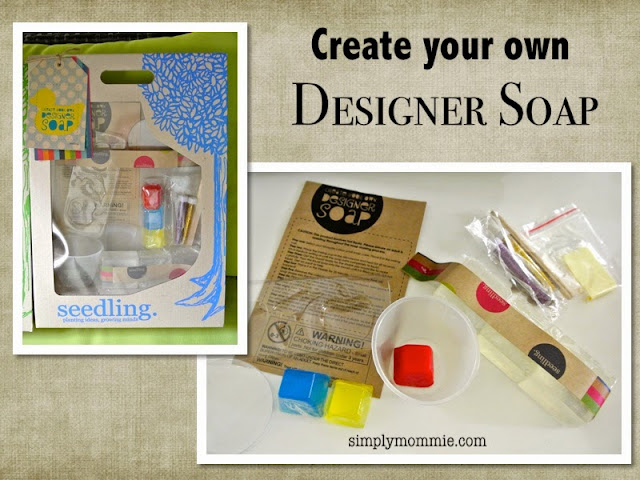
Besides name labels, we also received some Seedling creativity kits to work on with the kids. Again, which kits to choose was a major headache because everything looked so awesome and interesting! We eventually settled for the Designer Soap and Make your own recycled paper sets.

It was the first time we were doing such activities and I think I was possibly the most excited one of the lot! I have to be brutally honest and admit that I had the most say over which kits to pick eventually – it’s like fulfilling my childhood dreams to make these things!
For the Designer soap kit, first we melted the coloured soap and poured them into the mould to set.
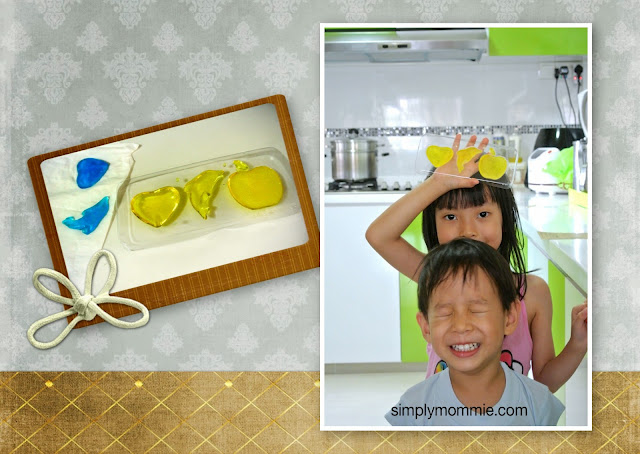
Then we melted the clear soap and poured it into the soap mould with the set shape.
The first time we did it, we didn’t wait for the clear soap to cool a bit first before pouring it onto the shape and it ended up melting the cute shape. It wasn’t stated in the instructions to wait but I guess it was commonsense to wait, but with excited folks, sometimes commonsense doesn’t quite prevail. Nevertheless, we took it as a failed experiment and made it a point to let the clear soap cool a little before pouring onto the cute shape in the soap mould for our second attempt.
This time it worked well and we sent off the soap to set in the freezer.
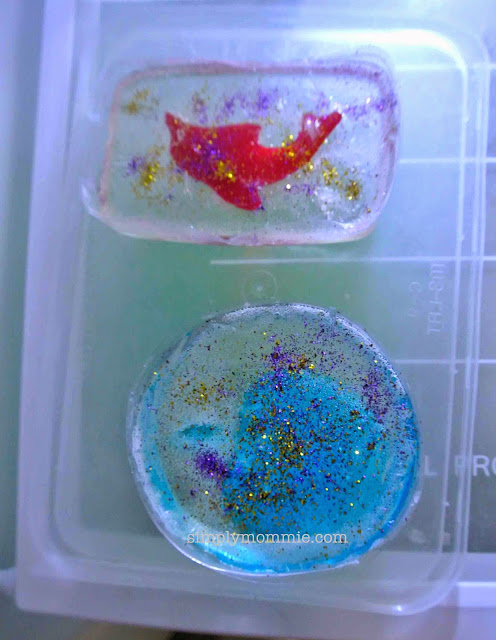
The learning point from our second experiment was that we should pour some of the clear soap into the soap mould first then place the cute shape in then top up with clear soap. We found that by putting in the cute shape first then pouring in the clear soap as per the instructions meant that there was a possibility that there were some parts under the cute shape that didn’t get any of the clear soap, ending up with a dent in the soap when we removed it from the mould (as you can see in the picture below).
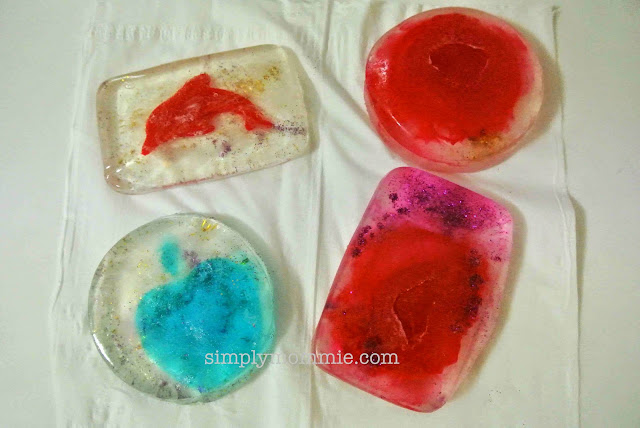
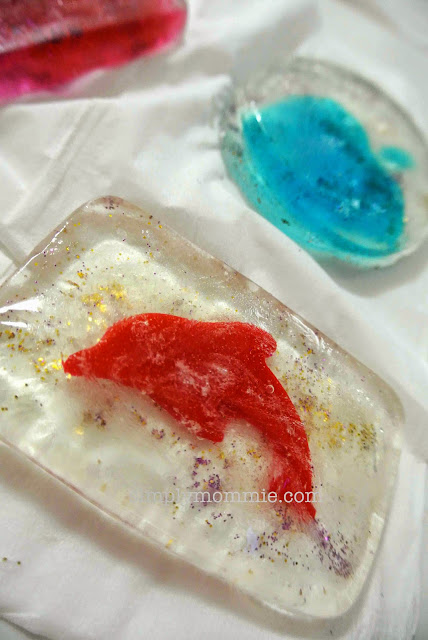
Our soaps from the first and second experiments
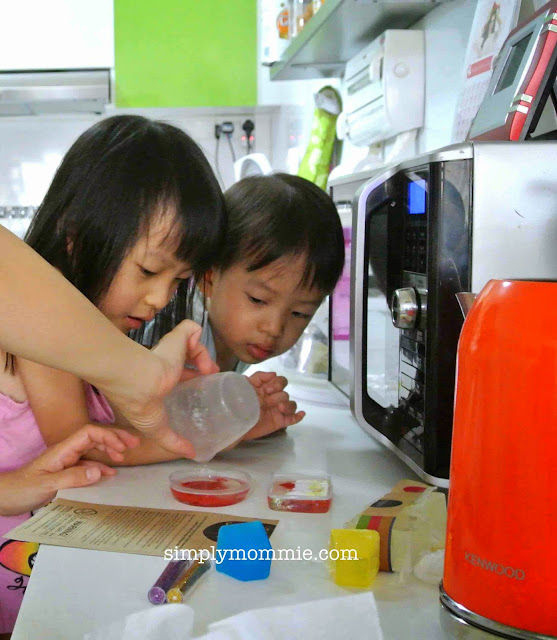
We also added in the glitter at the end as per instructions and found that the glitter didn’t mix well in the soap, so we thought we’d mix in the glitter earlier in the last experiment (there are a total of 3 blocks of clear soap so you can only do this thrice even though you would have extra cute shapes).
In our last experiment, we mixed in the glitter earlier into the clear soap after we melted it but the colour of the glitter went to the clear soap, making it coloured. But this time round the glitter was well spread out throughout the soap. Thankfully, the plastic soap moulds held up till we finished our last experiment because it was getting a little out of shape with the heat it had to endure.

We gave this pretty soap to her art teacher!
I’d say although the soaps didn’t quite turn out to be as beautiful as we hoped and imagined them to be, we definitely had fun and there were also learning points and key takeaways for us. In fact, we were so interested in soap making after that that we went online to check out how soap is made.
The second kit we got was one that I’ve always been interested in, but never attempted before – making recycled paper. I thought it was a good chance to show the kids that apart from putting our recyclable materials in the recycling bin to do our part for the environment, we can make recycled paper too.
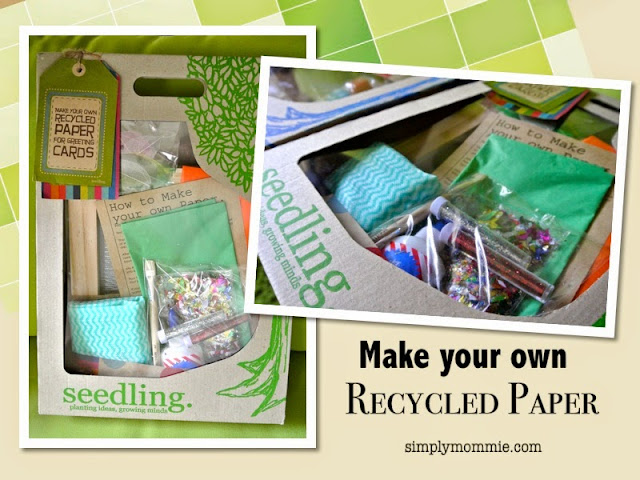
With the materials all conveniently provided in the kit, I didn’t need to look far for paper to be recycled as well as newspapers for the later part of the process. As the kit is meant for making recycled paper to create greeting cards, decorative materials were provided as well.
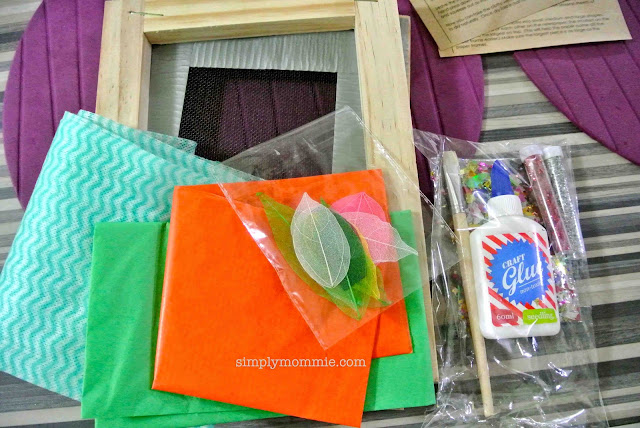
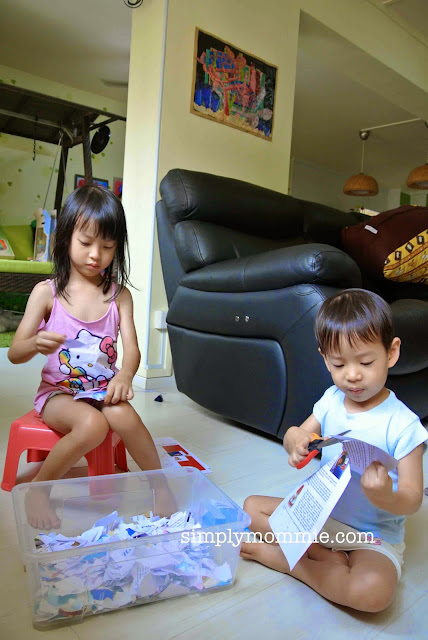
The first step was to tear/ cut about 12 pieces of A4 paper into small pieces. This would then be soaked in water for a few hours. Hence before we did our soap experiment, I got the kids to get this step done first so that the paper can be set to soak.
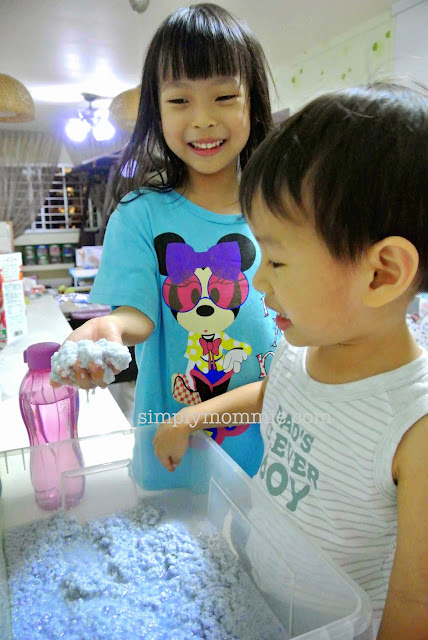
After the soaking was done, the next step was to blend the soaked paper in some of the water in which it was soaked in in batches. It was a breeze of course with my Philips Jamie Oliver blender, but I’m pretty sure you wouldn’t have too much trouble with a regular blender.
The kids then had a swell sensorial experience!
The rest of the steps needed all my attention and my hands and because water was involved, I didn’t take any more photos of the process, but I’d say, if you’re interested, go ahead and get this kit for Christmas!
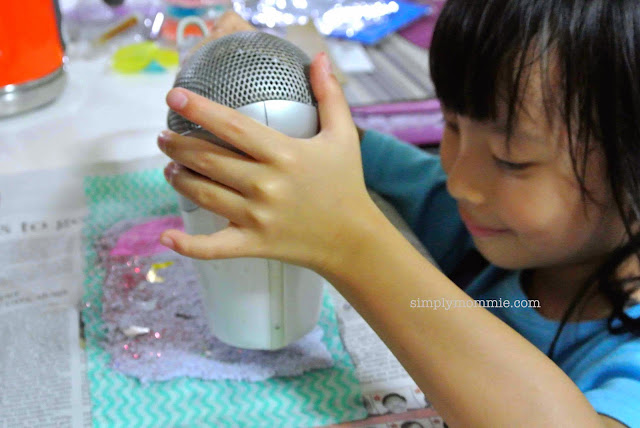
To speed up the drying process, my girl tried to dry the recycled paper with a hairdryer but eventually she grew tired and we decided that we’d just let nature take its own course.
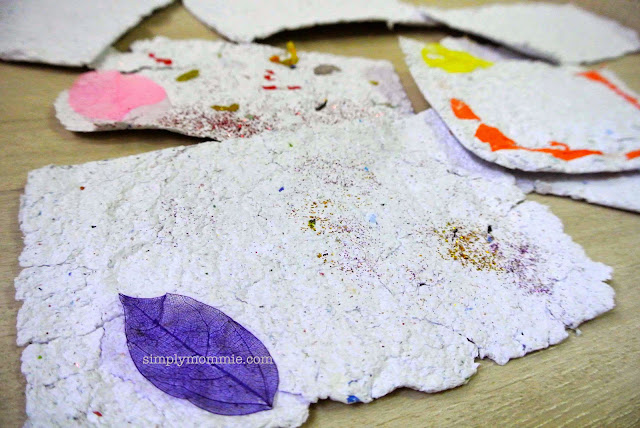
It took two full days for the recycled paper to dry naturally. When it was in the wet stage, it was all blue and purplish and I got really worried that it’d just been that dark a shade and I started regretting including three sheets of paper that were more blueish than the others. If you use regular white paper, I’m sure you won’t get this shade. So a helpful tip is that if you’re aiming for a certain colour in your end product, you might want to include that colour in the paper that you chose to recycle (e.g. a couple of sheets of red paper might make a pink pulp).
The only thing that we didn’t quite manage to do in the end was to get our recycled paper to bend into a card without breaking. Somehow it was quite fragile that way so we worked with its properties and designed our cards like postcards instead of folding it like conventional greeting cards. My girl decorated some of these during the ‘wet’ process and the glitter and decoration stayed on after the paper was dry.
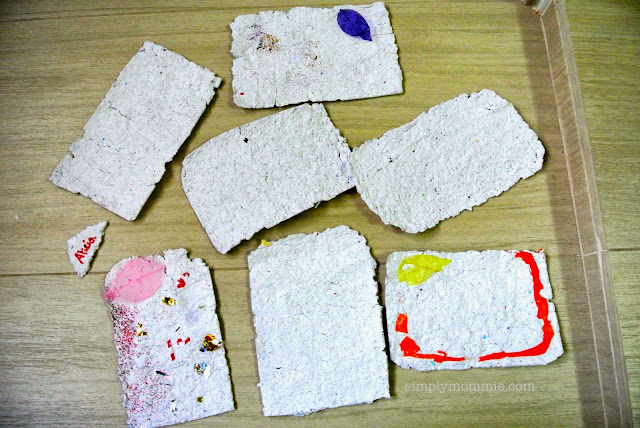
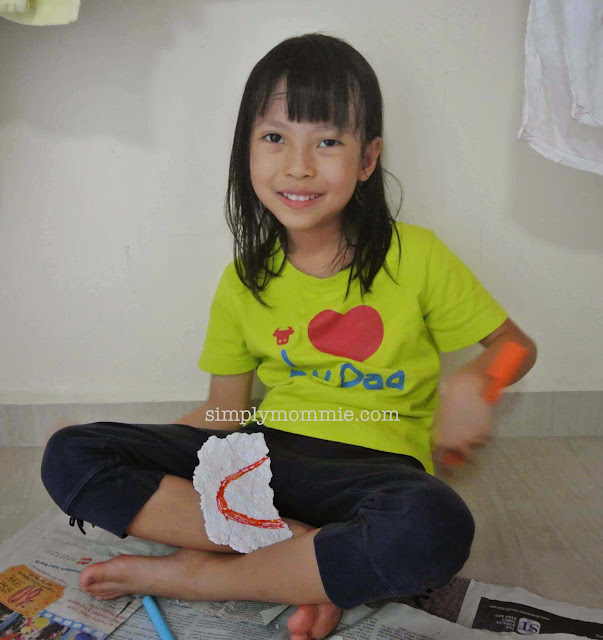
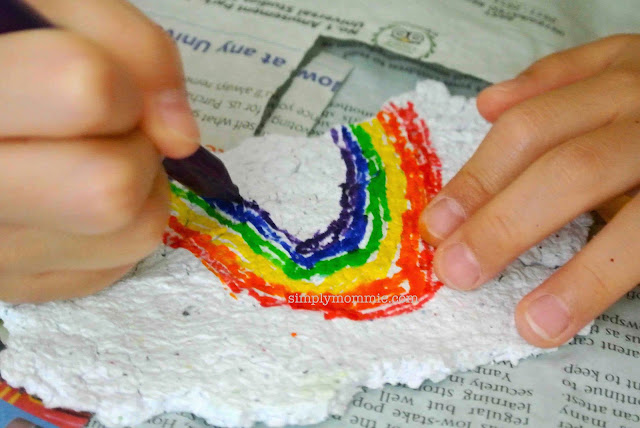
We did some experiments with one of the pieces to check how well the recycled paper takes to colouring with markers.
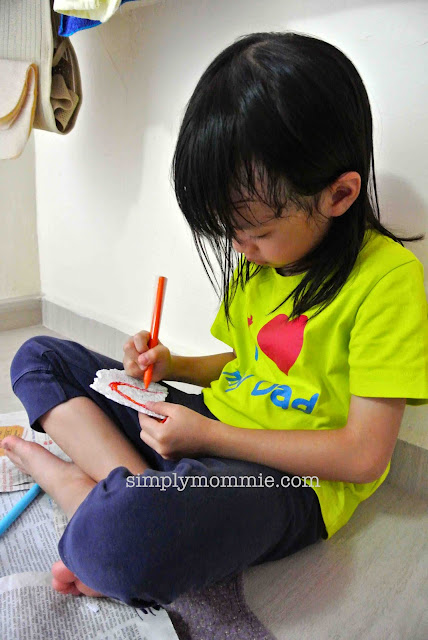
See her with her pretty bangs? Yeah, we did this activity way before she decided to take things into her own hands.
And it turned out it was good! 😀 The surface was bumpy as with recycled paper you find in stores but it held up well to colouring and decorating.
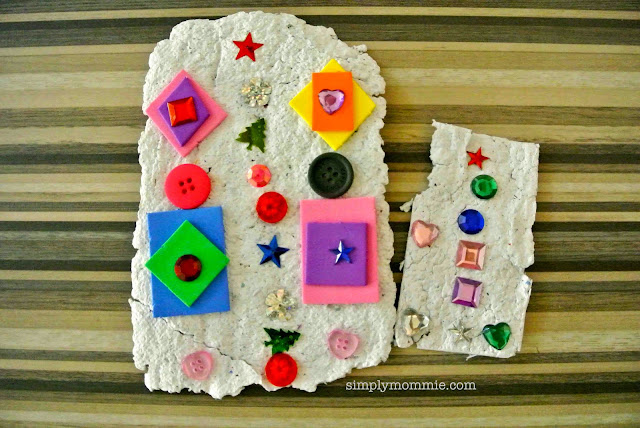
The photo below was taken after I accidentally crushed the recycled paper against something else while packing the table, which explains why you see that a couple of parts have chipped off. Generally the recycled paper held up well to cutting into various shapes as well so besides cards, we made bookmarks with the smaller pieces (like the one on the right featured below) – she chose to decorate with our own stash of supplies and I just left her with the box while I went to cook dinner.
I highly recommend the Seedling creativity kits, especially those that we don’t normally have the supplies to work with. My kids turned down their dad’s offer to go out that weekend to work on the kits so yes, these have great appeal. It definitely piqued interests and their curiosity (and mine too!). Granted, these are a little pricey and our end products might not end up as photogenic as the ones on the cover of the kits. However I feel that there’s a lot of mileage that you can get from the kit because once you get the kids interested (which they definitely will be), curiosity will lead them (and us) the rest of the way.
Here’s your chance to win a set of Tools for School Kit (worth $49.95) / Make your own designer soap kit (worth $77.95)! Simply follow the steps in the Rafflecopter widget below!
~~~~~~~~~~~~
Lovely and constructive comments are welcomed. Do hop over to my Facebook page where I connect with my readers and I would love to have you following me on Pinterest, Twitter and Instagram too 🙂


 Facebook
 Twitter
 Pinterest
 Instagram
These crafts are pretty interesting! Thanks for sharing!
Yes they are! Look out for the giveaway on the blog which starts tomorrow on this post! 😀
Its great to personalised the items, i m sure this will give a sense of pride to my girl over hher belongings n help her to take care of them.
These crafts r really kwel
Would lurv to win them
For holiday fun